
In today’s fast-paced business environment, securing your company’s financial data is more critical than ever. Intuit’s QuickBooks, a popular tool among small and medium-sized businesses, is crucial in managing and streamlining accounting processes. However, the usefulness of this tool is heavily dependent on the reliability and safety of the data it houses. That’s why regular backups of your Intuit QuickBooks company file are essential. In addition, regularly backing up your Intuit QuickBooks company file will perform regular database maintenance on your file to help it is free of corruption. In this blog post, we will guide you through a straightforward process of creating backups, helping you keep your business data safe and accessible at all times.
Creating regular backups for your Intuit QuickBooks company file should be a non-negotiable task in your business routine. This file becomes a central hub of your financial activities, containing valuable insights and details about your business transactions. Though it may seem like a complicated task, backing up your data doesn’t have to be a stressful process. This guide will provide a no-nonsense approach to safeguarding your data so you can focus more on running your business and less on potential data loss. Let’s start setting up a reliable backup for your Intuit QuickBooks company file, a simple yet significant step in ensuring your business’s resilience.
STEP ONE: OPEN YOUR QUICKBOOKS COMPANY FILE AND LOGIN AS ADMIN
Before embarking on the backup process, the very first step is to log in to your Intuit QuickBooks company file as admin. This allows you to have the necessary permissions to create a backup. To do this, launch the Intuit QuickBooks software and select your company file to open it. Next, ensure that you login as the ‘Admin’ user account from the login window that appears after you open your company file, as this role holds the required privileges to carry out the backup process. Once logged in, you are set to initiate the backup, safeguarding your valuable data against any unforeseen data loss. Simple and secure, this administrative login acts as your gateway to a more resilient business operation.
STEP TWO: USE THE FILE MENU TO BACKUP THE COMPANY FILE
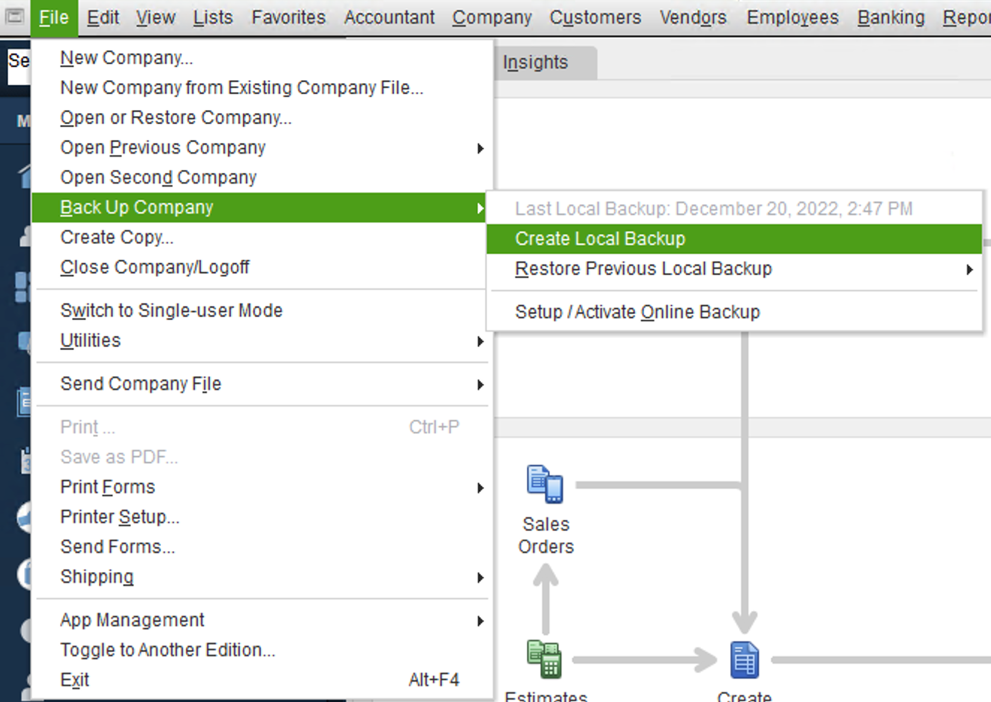
Once you have logged into your company file as the admin account, the next step, once your company file has completely opened, is to use the file menu and select the option to:
File – Back Up Company – Create Local Backup
This option can be seen in the following screen capture:
Once you have chosen to “Create Local Backup,” a wizard will begin to help you through the process.
STEP THREE: CONFIGURE THE BACKUP
Intuit created a wizard inside of its QuickBooks software to guide you through the process of backing up your company file. The wizard’s first screen will ask where you want to save your backup file. You have two choices: use an online backup service or backup the file locally in your Enclave session. For the sake of this article, we will assume that you are backing up your company file to a location on the Enclave servers.
At this time, please select “Local Backup” from the screen that appears, as you see in the following screen capture, and click “Next” to continue:

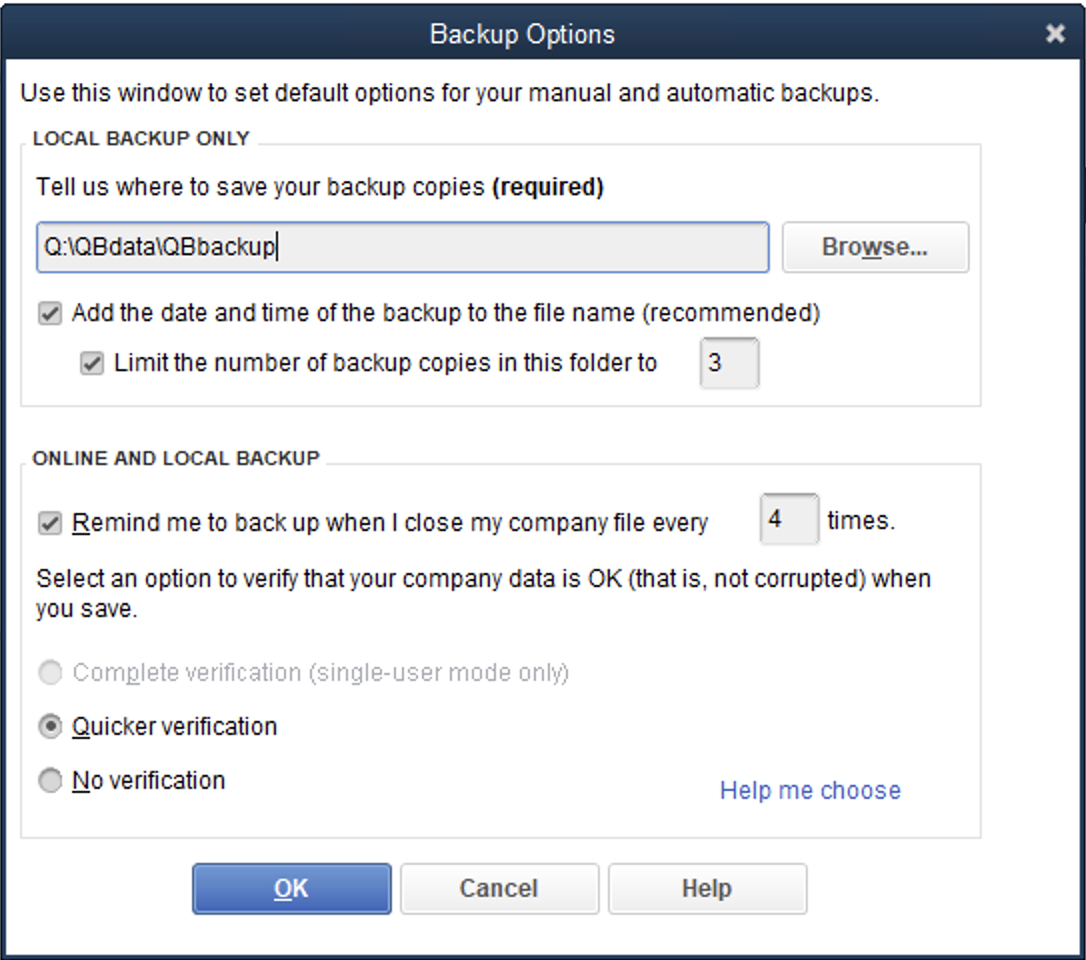
Next, you will need to select where you would like to save the backup file you are creating. Enclave recommends that you create a folder in your “Q Drive” to save all of your backups. Ideally, you would create a folder called:
Q:\Backups\
The following screen capture illustrates the other options you have during the backup process. Please feel free to customize the settings if you feel comfortable. But at a minimum, please use the Browse button to select the location where you would like to save your backups, and then click “OK” to continue.
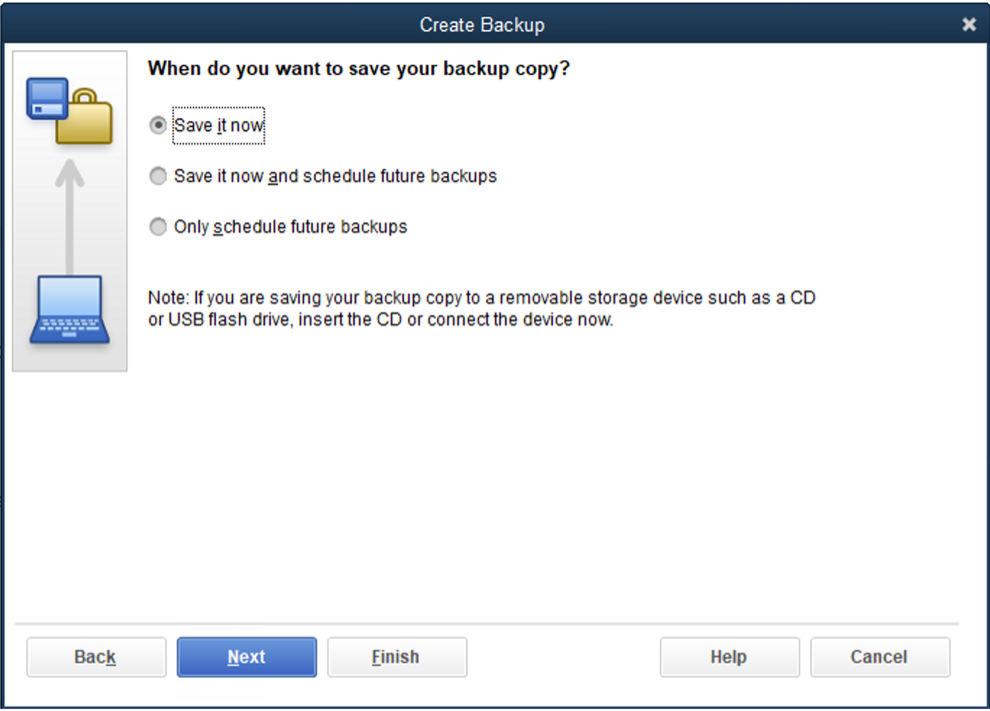
Next, you will be given options for when you would like to perform the backup. At this time, please select the default option of “Save it now” as shown in the following screen capture, and then click “Next” to continue.
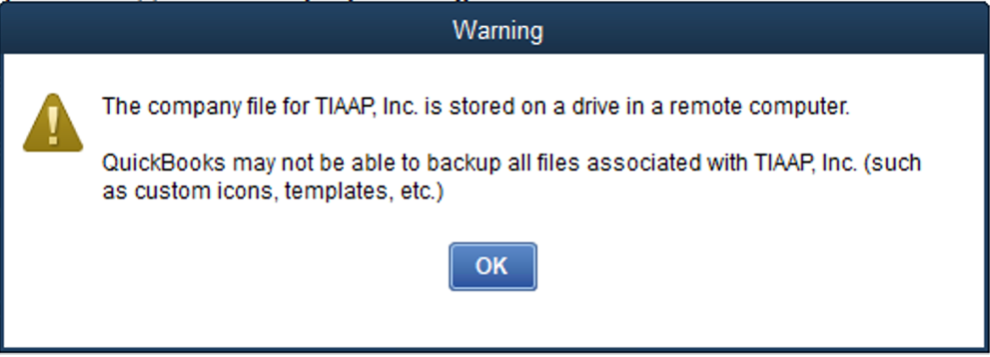
At this point the wizard will progress and warn you that the file is located on a drive on a remote computer. This is normal and a part of the way Enclave stores and supports your company file. Simply click “OK” when the following screen appears:
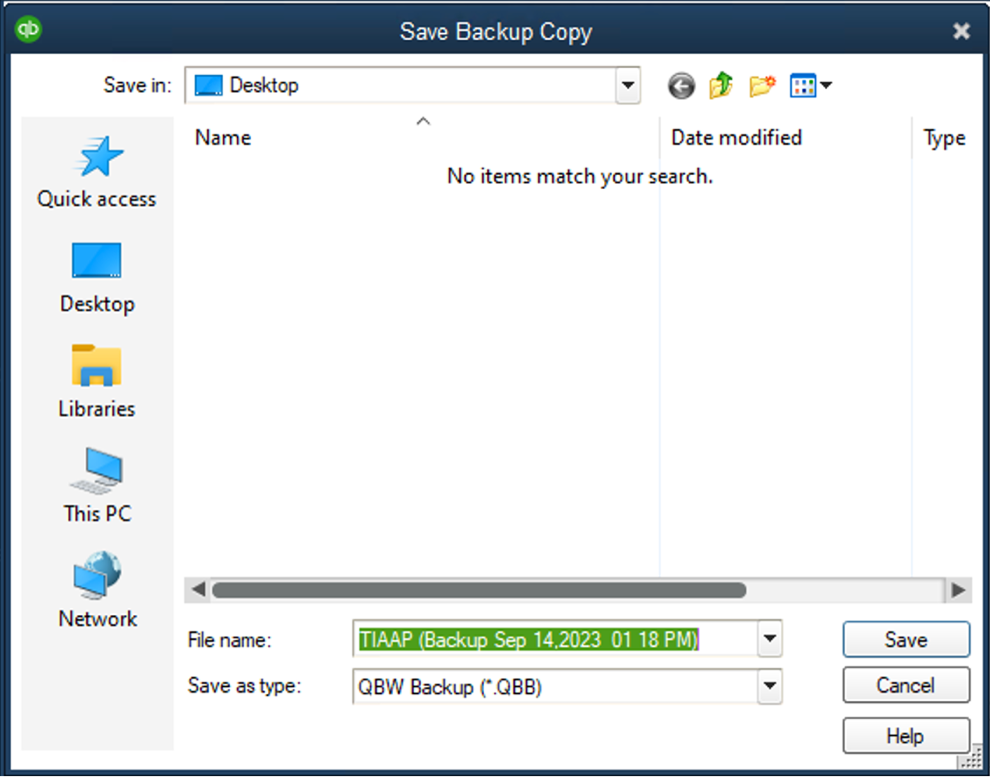
Next, you will be presented with a reminder of where you will be saving your backup file. When the following screen appears, simply click “Save” to continue:
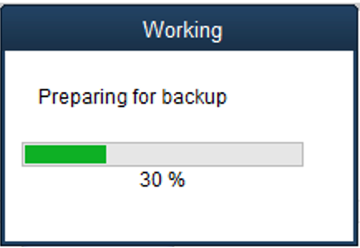
At this point, Intuit QuickBooks will begin to backup your company file. The following screen will appear:
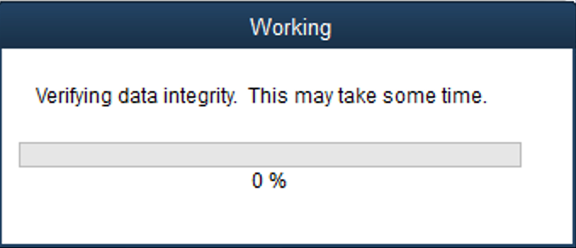
Next, the following screen will appear:
Finally, the next screen will appear letting you know you have successfully backed up your file:
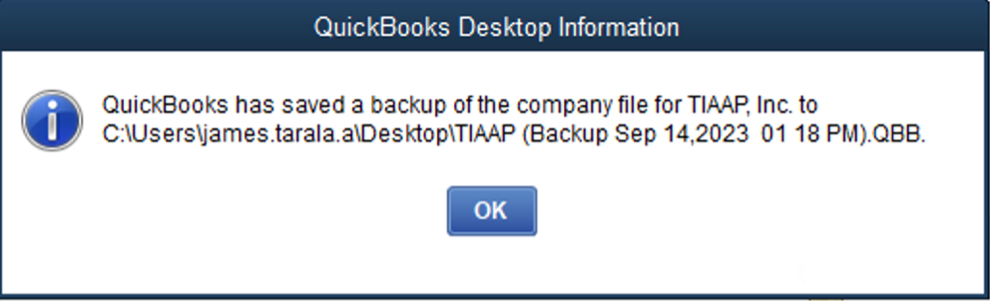
Congratulations on successfully completing a vital step in safeguarding your business’s financial data! Your proactive approach in backing up your QuickBooks company file ensures the security of invaluable data and paves the way for smooth and uninterrupted business operations. Moving forward, you can rest easy knowing that your financial information is tucked away safely ready to be accessed whenever needed. We recommend making this a regular practice, backing up your file at least monthly. Although Enclave backs up your company file on a regular basis, manually performing a backup helps ensure file integrity on the Intuit QuickBooks database file and will help keep the file efficient for use when you need to use it.
FOR ADDITIONAL SUPPORT, PLEASE CONTACT ENCLAVE HOSTING
If you still need additional help, please contact Enclave Hosting Support, and we will be more than happy to help you with this process. You can contact support via email at support@enclavehosting.com or by phone by calling 888.315.7776, and choosing Option 2 for technical support.