
When working with QuickBooks, one of the foundational elements that ensures seamless operations is the efficient management of user accounts. Depending on the size and structure of your organization, you may need multiple individuals to access the software, each with specific roles and permissions. Ensuring that each user has the right access not only enhances operational efficiency but also maintains the security and integrity of your financial data.
In this guide, we’ll delve into the step-by-step process of managing user accounts within QuickBooks. Whether you’re looking to add new users, modify existing permissions, or enhance security measures, understanding these fundamentals is pivotal. By optimizing user account management, you’ll be better equipped to maintain order, streamline tasks, and safeguard sensitive information within your organization. Let’s dive in and explore the best practices for managing user accounts effectively.
Before You Begin – Understanding QuickBooks vs Enclave Logins
It’s important to distinguish between an Intuit user account and a Microsoft Windows login. The two serve very different purposes and are managed through separate systems. A Microsoft Windows login is primarily associated with accessing and securing your computer or workstation. It governs your permissions on the computer, which files and programs you can access, and your personalized settings on the machine. On the other hand, an Intuit user account is specific to Intuit products like QuickBooks. This account determines what features and data within the software you can access, and it’s crucial for ensuring that only authorized individuals can view or modify financial and company data. In simple terms, while your Windows login gets you into your computer, your Intuit account gets you into your QuickBooks software and its features. Mixing up the two can lead to confusion, so always remember the distinct roles each one plays.
Managing QuickBooks User Accounts
Please note, if you are uncomfortable making this type of administrative change to a company file or do not have the admin password to your company file, please contact your bookkeeper or CPA to perform the following steps for you. Enclave does not store your company file admin password. However, your bookkeeper or CPA may be able to help you with this process.
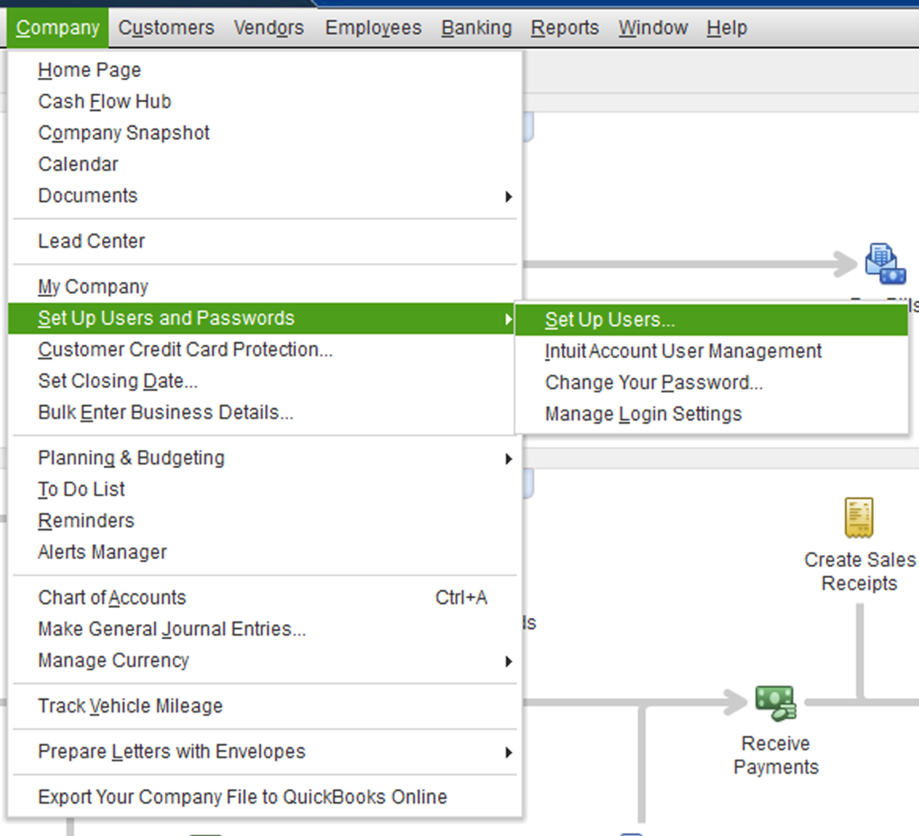
To begin, please open QuickBooks and then log into your company file. Once you are logged into your company file, select the “Company” option from the menu at the top of the QuickBooks window and then choose the option for “Set Up Users and Passwords,” followed by “Set Up Users” as in the following screen capture:
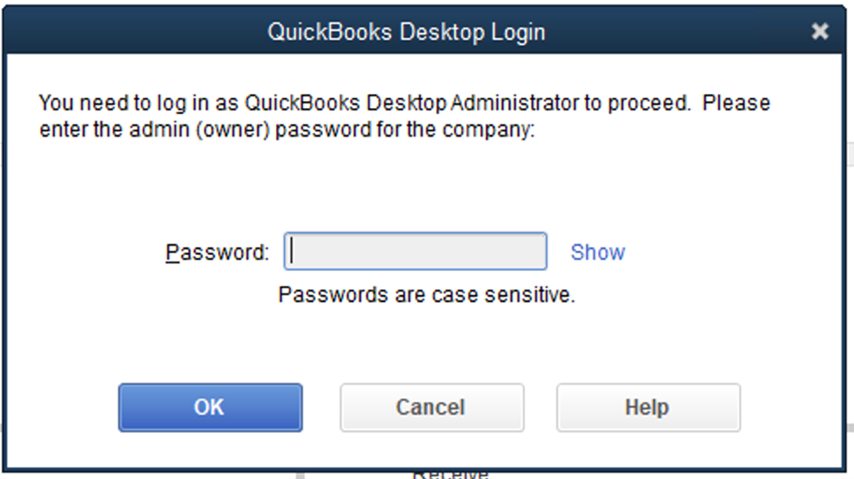
Once you make that selection, the following screen will appear, asking you for your QuickBooks admin password again. Please enter the admin password and then click “OK” to continue.
Once you have successfully authenticated again, the following screen will appear, which lists all of the user accounts currently configured in your company file:
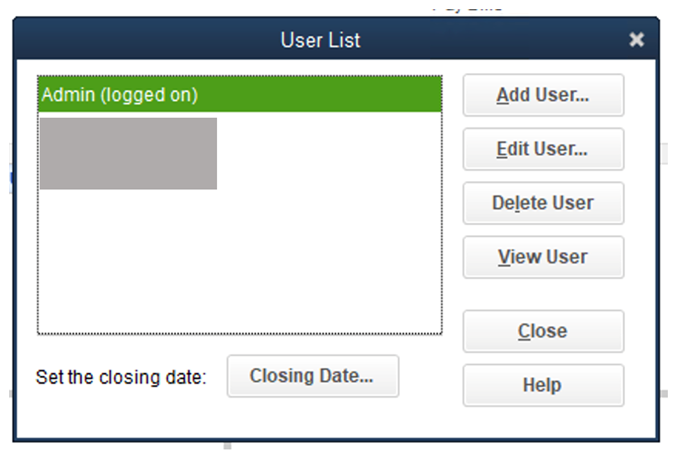
From this window, you can choose to Add a user, Edit a user, Delete a user, or View the permissions for a user.
If you would like to add a user to the company file, select the option to “Add User,” and the following screen will appear:
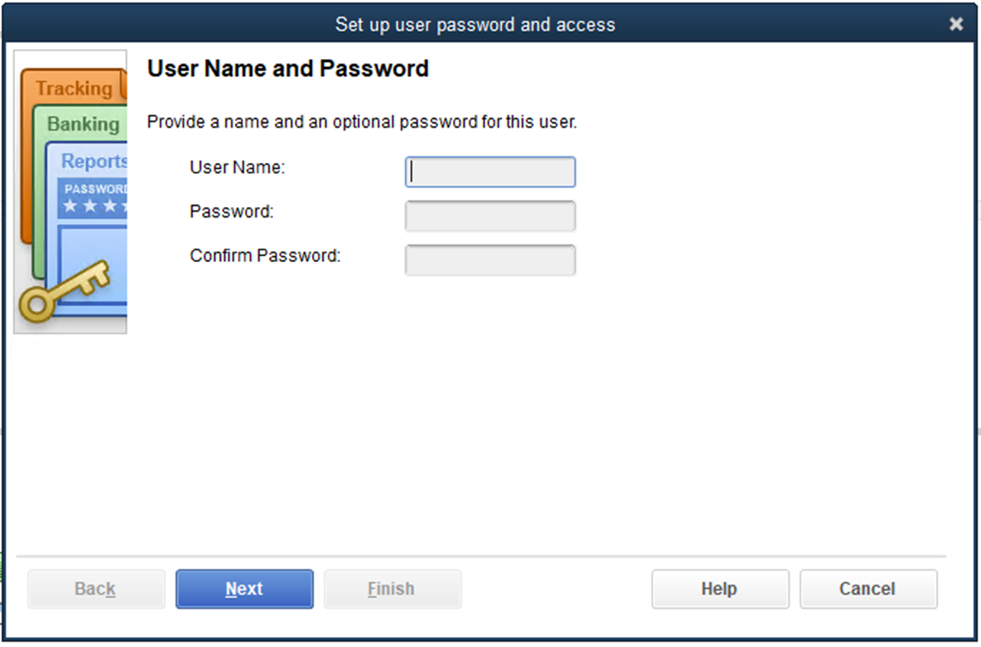
Enter the username for the new user account, enter the password you would like to use for this account (twice), and then select the ” Next ” button to continue. The following screen will appear:
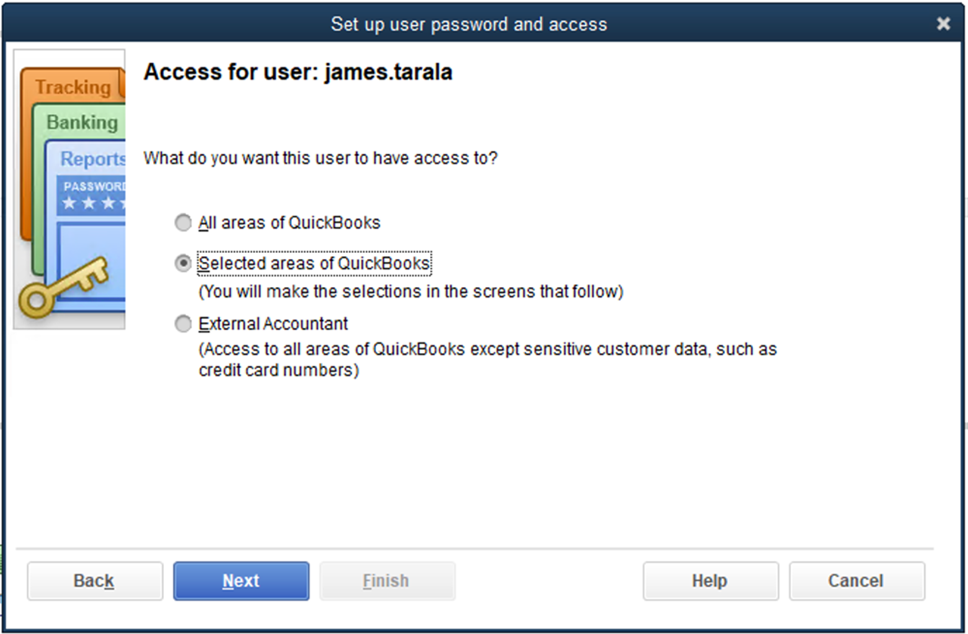
The screen shown above allows you to select granular access levels to your new user account. If you are unsure what access the new user account should have, please contact your bookkeeper or CPA to help you decide and select the appropriate options.
Please note there are multiple pages of permissions in this section. Please make sure you are comfortable making these decisions prior to continuing or contact your bookkeeper or CPA for assistance.
For Additional Support, Please Contact Enclave Hosting
If you still need additional help, please contact Enclave Hosting Support, and we will be more than happy to help you with this process. You can contact support via email at support@enclavehosting.com or by phone by calling 888.315.7776, and choosing Option 2 for technical support.